Print Workflow Automation: How DesignO Connects to Jira, Slack and WhatsApp Using N8N
 Abhishek Agarwal
Blog article content
Learn how a new print order can automatically create a Jira ticket, alert your team on Slack and message your customer on WhatsApp, using DesignO with a workflow automation platform like N8N, Zapier or Make.com.
If you run a print business, you know how many steps sit between an order and a finished job: checking the artwork, creating a ticket for production, telling the team, updating the customer. When all of that is manual, things slip, and customers end up chasing you for updates.
❌ Artwork files downloaded and forwarded by hand
❌ Production tickets created late or with missing details
❌ Team members finding out about new orders after the fact
❌ Customers asking "where is my order?"
Workflow automation takes over those repetitive steps so your team can focus on printing.
What Is Print Workflow Automation?
Print workflow automation connects the system where orders are placed to the tools your team already uses, so that each new order triggers the next steps on its own: a production ticket, a team alert, a customer update, and, if you want, a CRM or ERP entry.
Workflow automation platforms make those connections without heavy coding. Examples include n8n, Zapier, Make.com, Pipedream, Activepieces and Power Automate. This walkthrough uses n8n.
How It Works
DesignO is an API-based web-to-print solution that can connect with workflow automation platforms such as n8n, Zapier, and Make. These integrations allow you to connect DesignO with the internal tools your business already uses, helping automate order processing, production task creation, team notifications, and customer updates, all within a connected workflow.
A. The Customer Side
1. Choose a product on your storefront, such as Shopify or WooCommerce.
2. Personalize it in the DesignO design tool with text, artwork and options.
3. Review and check out. Artwork setup fees and the order total are confirmed before payment.
B. The Backend Automation Flow
1. Order placed. Your storefront sends a notification or web call to DesignO.
2. DesignO starts the flow. DesignO triggers the automation you set up in your workflow platform.
3. Your tools update. The workflow can message Slack, create a Jira ticket, send a WhatsApp message, and add CRM or ERP steps based on your requirements.
4. Print-ready files per order. The artwork created in the designer travels with the order into your internal tools, so your team does not have to open the DesignO portal just to download it.
Walkthrough: One Order, Three Automatic Actions
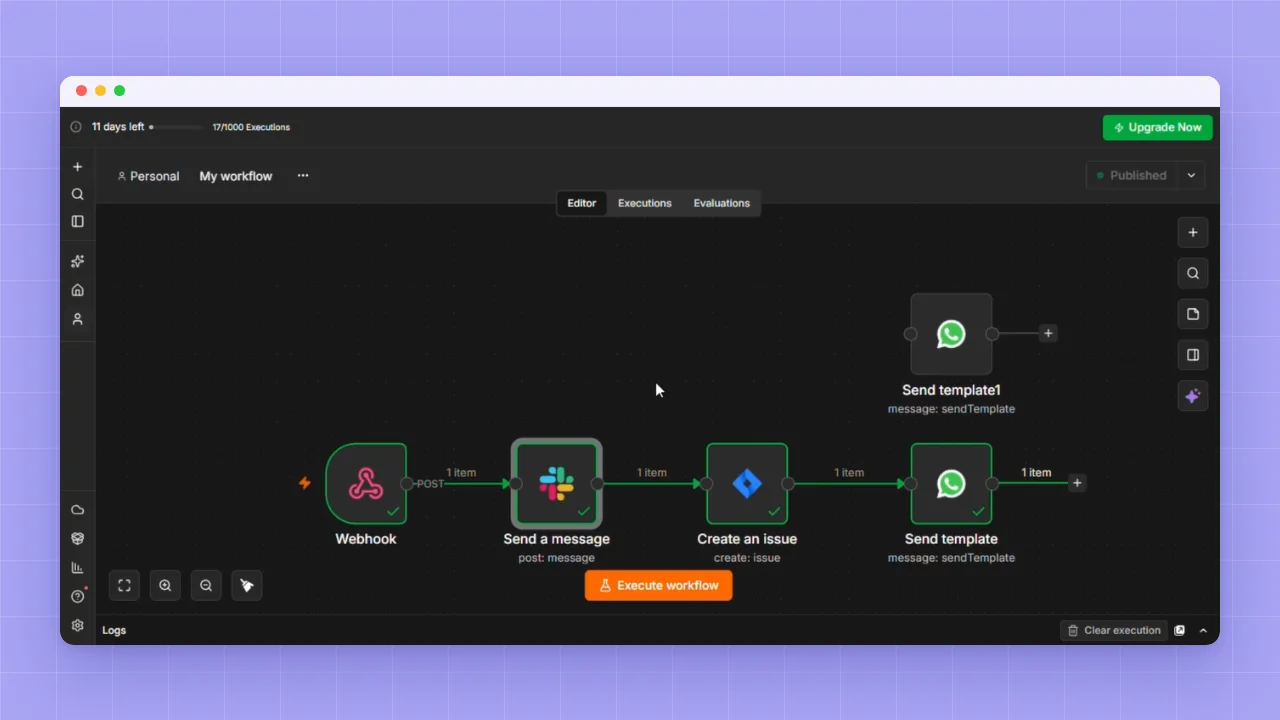
Step 1: The workflow in n8n
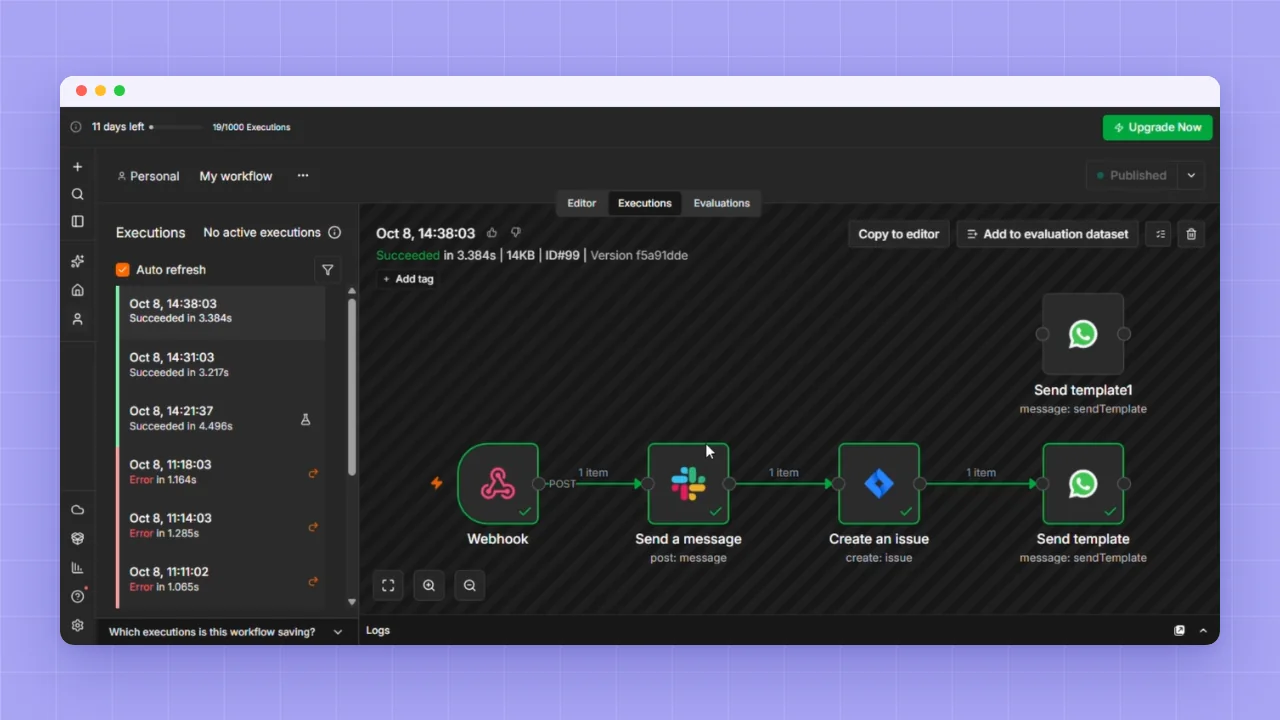
The sample workflow starts with a webhook trigger. From there it sends a message to Slack, creates a Jira ticket and sends a customer message.
Step 2: Place an order on the demo storefront
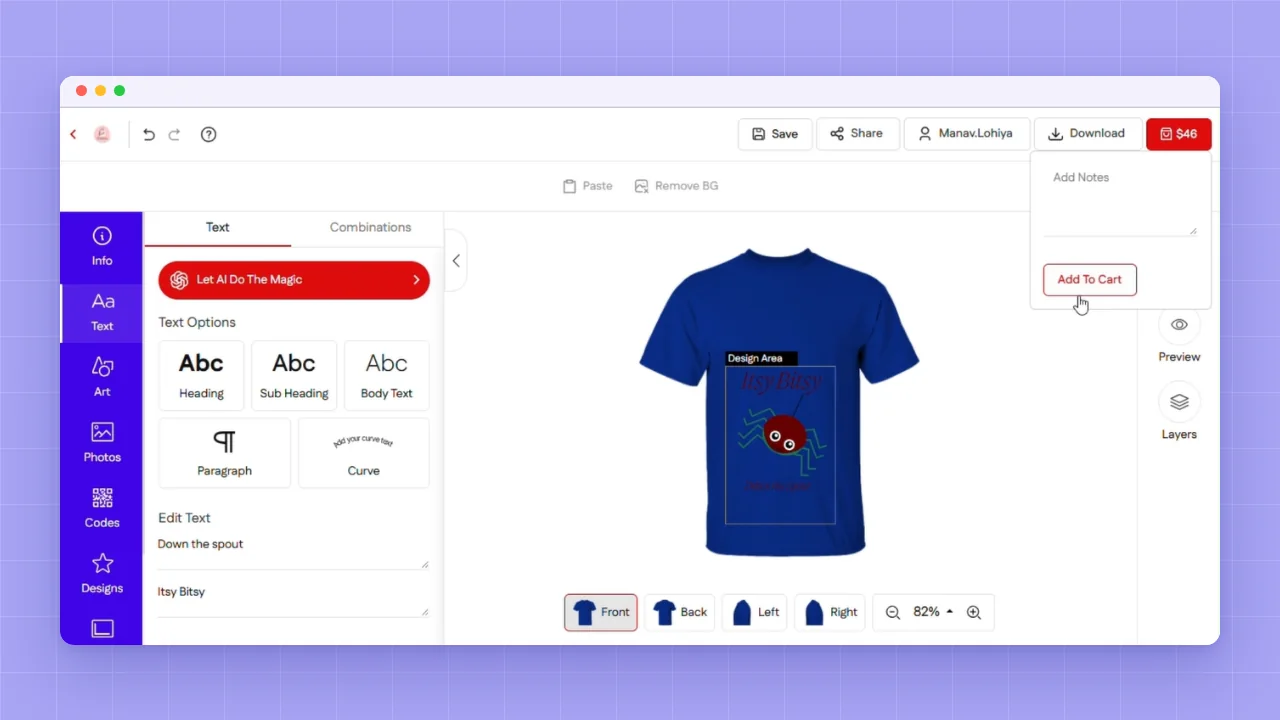
We add a blue t-shirt in size M, then click Personalize to open the DesignO design tool. We add custom artwork, remove the default items, resize the graphic and add a heading and a subheading. After reviewing the artwork, the customer can download it or go to the cart.
Step 3: Check out
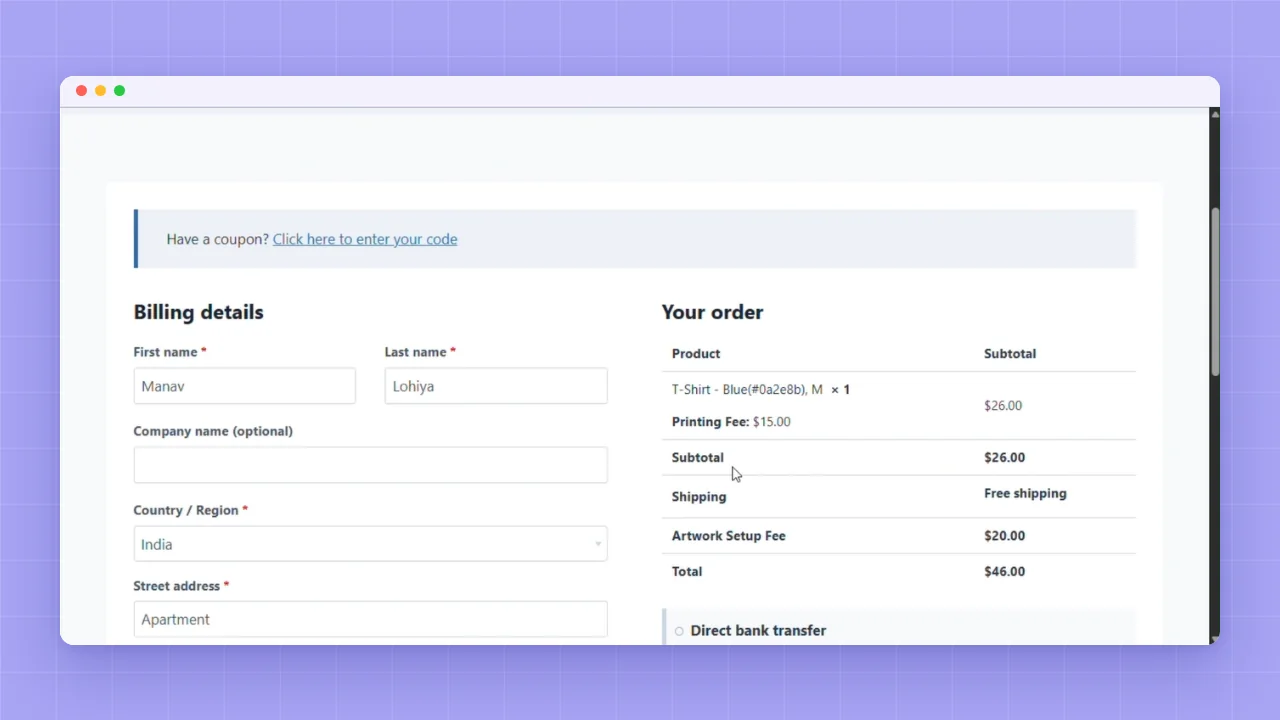
We confirm the artwork setup fees, proceed to checkout, review the details, choose a payment mode and place the order. New customers fill in their information, and returning customers see it pre-filled.
Step 4: The automation runs
Once the order is placed, the callback reaches DesignO, and DesignO starts the workflow in n8n. In the demo, the execution finished in about 3.4 seconds.
Step 5: Slack alert
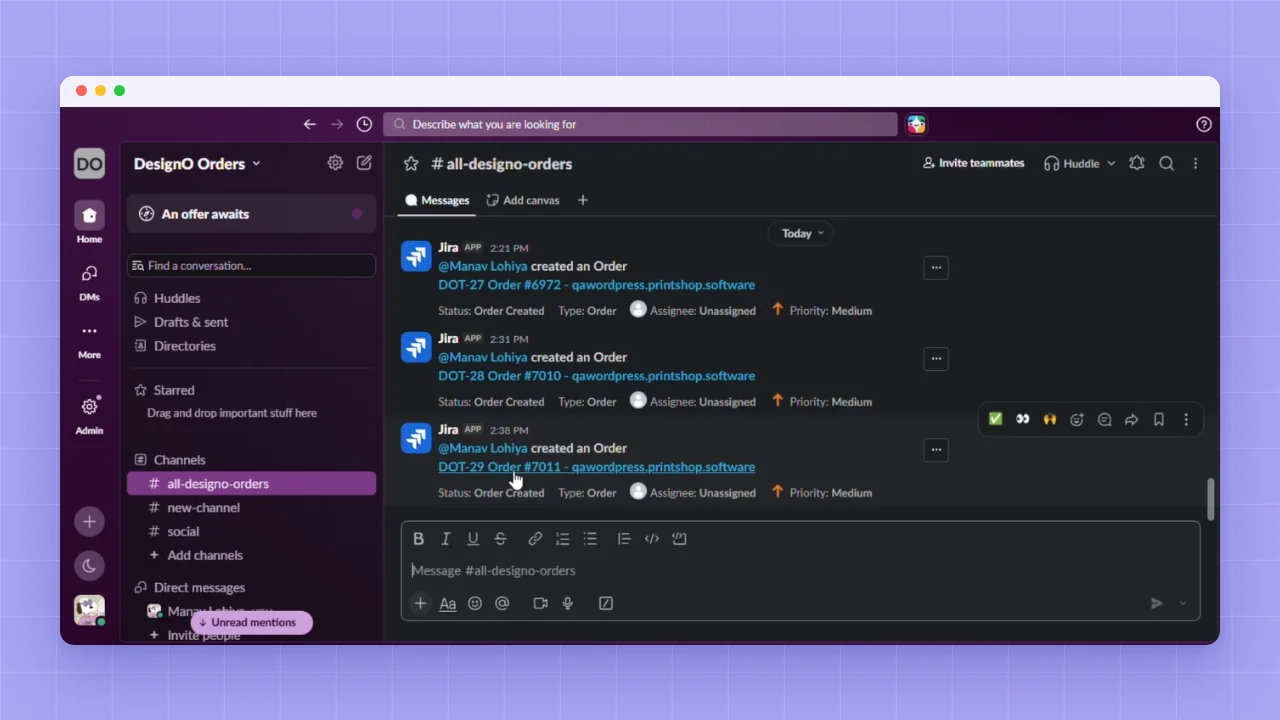
A new message appears in the team channel with the product, colour, size, product ID and SKU, so everyone knows a new order has arrived. It also carries a link to the Jira ticket, so the team can jump straight to it.
Step 6: Jira ticket on a custom workflow
On the Kanban board, the new ticket holds the order ID, the product details, the printing fees, shipping method, payment mode and date, due date, subtotal and grand total. The status starts at "order created" and follows a custom workflow:
Order created → Job started → Preparing artwork → Ready for printing → Printing, cutting and folding → Packaging → Ready to ship → Shipping → Delivered
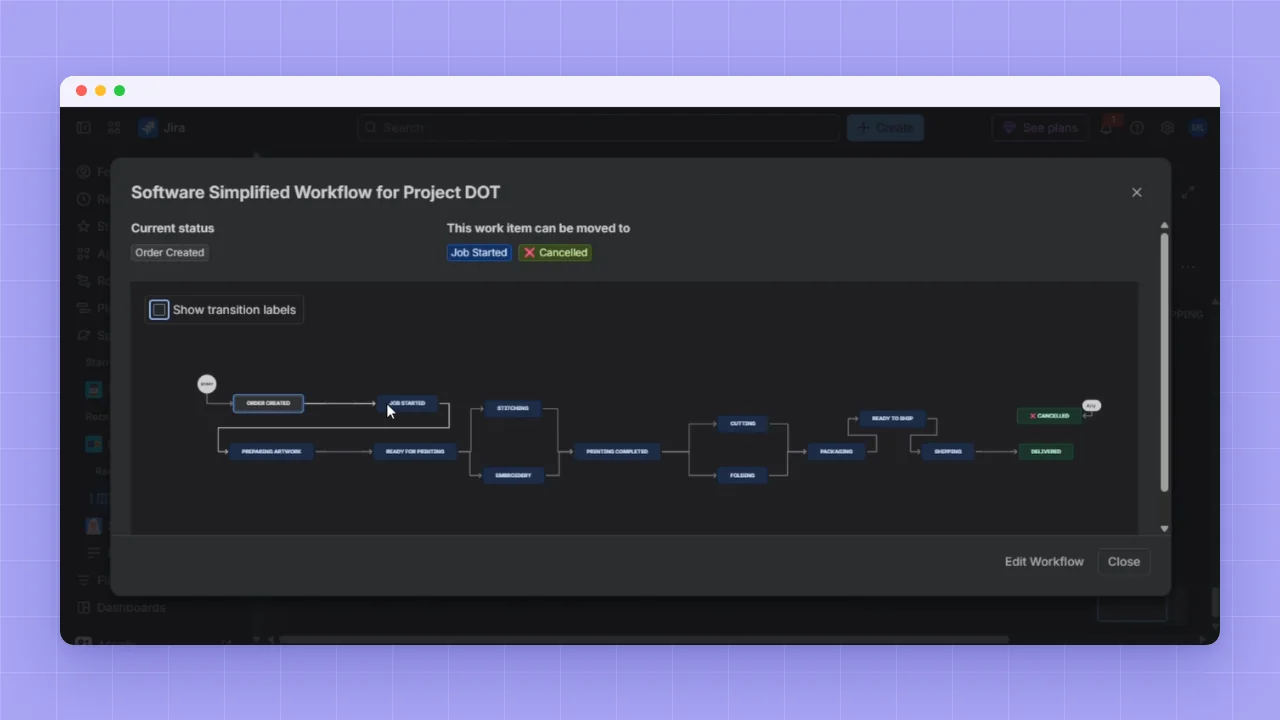
An order can be cancelled from any stage, and the production steps can be split by print mode and recombined later. When a ticket is assigned, that person is added to the watch list and receives updates by email and notification. The board summary shows how many jobs sit in each status.
Step 7: WhatsApp update to the customer
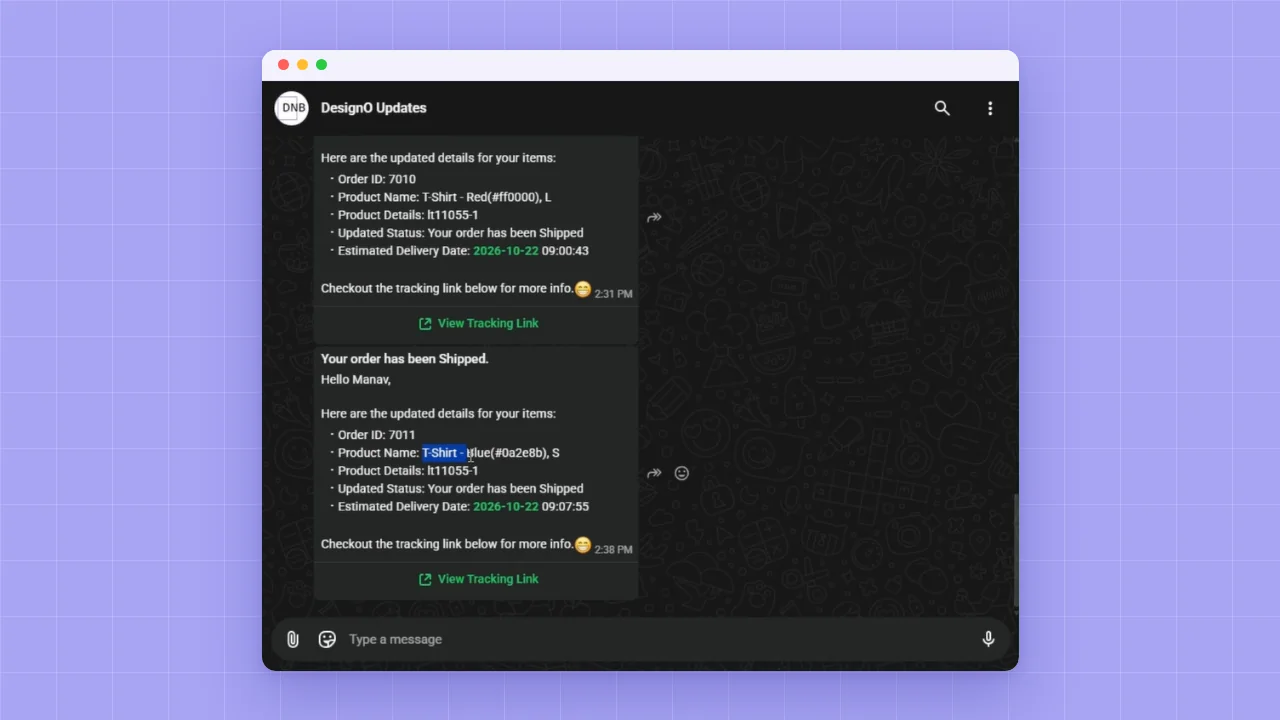
The customer receives a message with the product, colour variant and SKU, plus a tracking link, for example "your order has been shipped". WhatsApp messages come from a template that you create in Meta Business Suite using a business account. Once the template is approved, the details fill in dynamically for every order.
Why Manual Print Workflows Break
Email threads, downloaded files and hand-typed tickets can work at ten orders a day. As volume grows, files get lost, tickets miss details, and customers wait for answers.
This is not a people problem. It is a workflow problem. Automation makes every order follow the same steps in the same order.
Benefits of Print Workflow Automation
A. For Print Businesses
Faster handoffs: Tickets, alerts and files are ready as soon as the order is placed.
Fewer errors: Order details are copied by software, not by hand.
Team visibility: Slack and Jira show the same order at the same time.
Flexible: Swap or add tools without redesigning your storefront.
Scalable: Add CRM or ERP steps as your business grows.
B. For Customers
Proactive updates: WhatsApp messages with tracking links.
Fewer follow-ups: No need to chase for status.
Consistent service: Every order is handled the same way.
Who Should Use It?
Print service providers and trade printers handling steady order volumes
Garment decorators and merchandise sellers with many small personalized orders
Packaging and label printers who need clear job details
Teams already using Jira, Slack, WhatsApp, a CRM or an ERP
What to Plan For
Process first: Map your production stages before building the workflow.
WhatsApp templates: They need a business account and approval before use.
Triggers and connectors: Confirm what DesignO's API and your chosen platform support.
Testing: Run test orders before going live.
Ownership: Decide who maintains the workflow.
Getting Started
List the manual steps between order and delivery.
Pick an automation platform, such as n8n, Zapier or Make.com.
Connect your storefront and DesignO.
Build the first workflow: one ticket, one alert, one customer message.
Test with a demo order.
Add CRM, ERP or email steps.
Ready to See It in Action?
See how DesignO and print workflow automation can run your order-to-delivery process. Get a free demo.
Frequently Asked Questions
Abhishek Agarwal
Co-founder/CMO, DesignNBuy
Abhishek Agarwal (Co-founder/CMO, DesignNBuy) has 15+ years of IT & web-to-print experience. He specializes in sales, marketing, and strategic business growth, delivering innovative solutions to global printers and mentoring teams.
All Posts